
Monday, December 31, 2012
Wednesday, December 26, 2012
Christmas Frame
Steps for making the Christmas Frame:
Pick out the wooden frame of your choice. I painted mine white but that is not necessary. Cut our your designer series paper about an 1/4" bigger than the actual frame. Once its cut you will then need to cut the inside of the frame for the designer series paper.
Apply some Modge Podge Glue to the frame and then adhere the designer series paper. Apply about three more coats of modge podge glue to the top of the paper, wait about 3 minutes between each coat.
Now for the inside of the frame - measurements will depend on the size of your frame. Pick about what you want on the inside of your frame, stamp that image on some card stock. I used Vanilla cardstock. Then you need to pick out two different colors of card stock for your layers. I used the glimmer card stock for one of them as it adds an added appeal.
Have fun with it!


Dryer Sheet Method

Monday, November 19, 2012

Sunday, November 18, 2012
Evergreen Card Class
Take a peak at what we will be doing this Saturday. I love the Sanding Kit with Core'dinations paper that Stampin Up offers now.


 We start at 11 a.m. @ Cedar Grove Baptist Church. If you want to attend let me know.


Sunday, October 28, 2012
Evergreen
 |
| Want to learn some new techniques with new Stampin UP Products? Stay tuned for more information. |
Thursday, October 4, 2012
Christmas Card Swap 2012
Take a look at the cards I received from my swap. They give you some great ideas.


Monday, October 1, 2012
Nature Walk Card Class
Little late but take a look at the cards we did last month with the Nature Walk stamp set.


Saturday, September 29, 2012
Upcoming October Class
I love Saturdays where I can design and have fun in my stamping room. Today was that day. Now take a look and let me know which cards you want to make on October 13, 2012 at Cedar Grove Baptist Church.
Thanks for Looking....


Thanks for Looking....


Tuesday, August 28, 2012
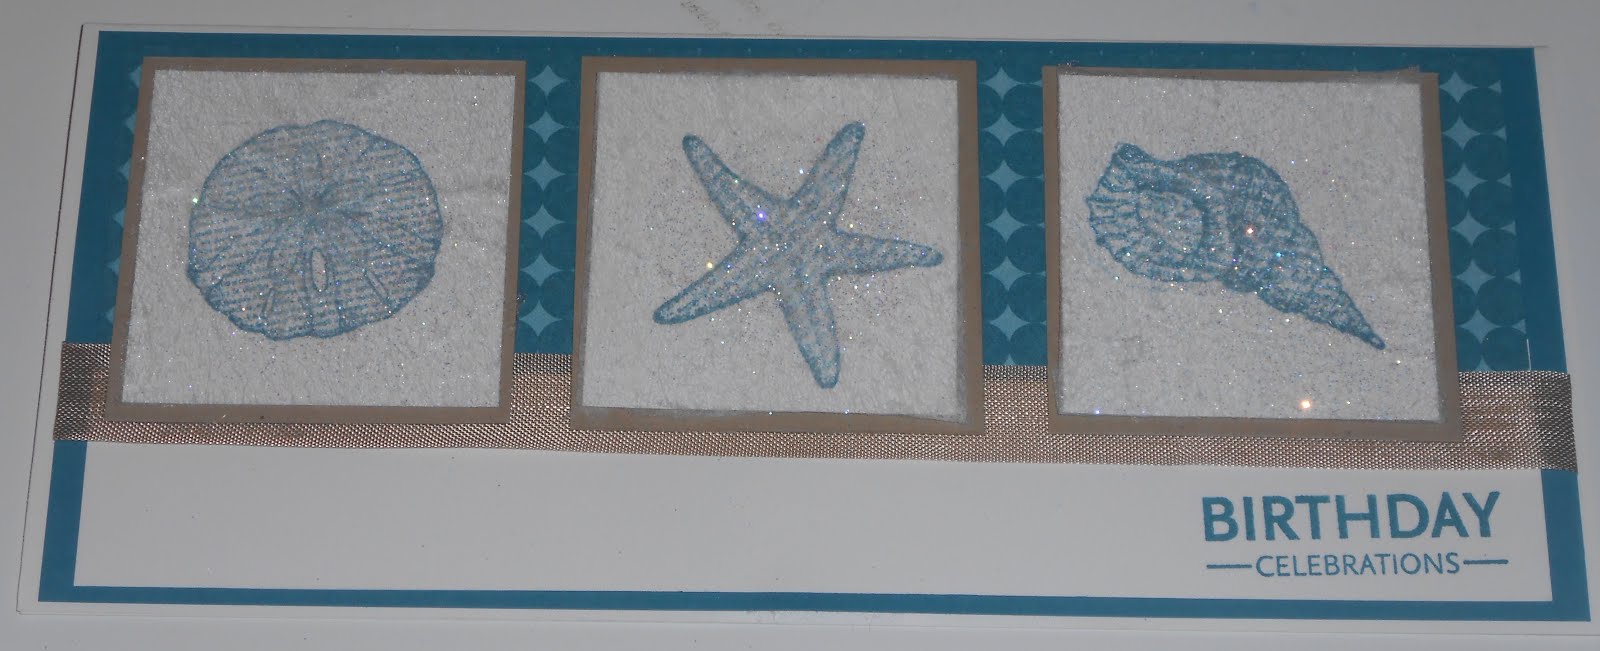
A Lazy Sunday
So after a Sunday afternoon nap I decided to try one of our new stamp sets, By the Seashore. After a big storm such as Issac I like to go to the beach and see what kind of cool shells I can add to my collection. This is a clean and simple card to whip up in now time. Enjoy!


Saturday, August 25, 2012
Christmas Card Swap
I am working on a Christmas card swap. Here are two of my choices. I think it will be the first one. More pizzazz. What do you think?


Friday, August 10, 2012
It's Clearance Time
Stampin UP is offering some of the discontinued fabric at the low price of .99. Click this link to access the fabrics: Discontinued_Fabric_US.pdf
Check it out. Only while supplies last.
Check it out. Only while supplies last.
Sunday, July 29, 2012
July's Class - Folding Class
We had so much fun yesterday. I hope everyone enjoyed themselves as much as my mom and I did. Below you will see the cards we made. Want a makeup class? Contact me and I will be happy to set one up. Have a great week!


Friday, July 13, 2012
Learning something new
I love to learn something new. Last Saturday I learned the fancy Rosettes that are featured everywhere in the new catalog. Stampin UP came out with a die cut to make these but I learned how to make them with the new score tool from SU.
Check it out with some of the new Designer series paper!


Check it out with some of the new Designer series paper!


Monday, July 9, 2012
July Class - Sneak Peek
This past Saturday my mom and I were able to send some time in my new stamping room. We are going to have a "Fold" class. You will make (3) different folds with cards and make (2) of each card. The sample below will use a different designer series paper and card stock but you can get an idea of what we will be doing. Are you getting excited?


Monday, May 28, 2012
Congratulations Graduate!
I am so sad to see the Medallion Stamp set go away. I am falling in love with it!


Subscribe to:
Posts (Atom)